The microscope light source is one of the most important parts of your instrument. Correct illumination enables optimal observation of your samples as well as image capture and data analysis. Depending on the type of fluorescence excitation light source (mercury arc lamp, mercury metal-halide lamp, or LED), there are different ways to improve your system.
As the second part of our microscope improvement series, this post will provide helpful tips to optimize your fluorescence light source.
Mercury Arc Lamps
Traditional mercury arc lamps are usually mounted in a lamp house attached directly to the microscope, though on systems like confocal microscopes their output may be delivered via a light guide. To maximize the life of these light sources, perform these four best practices while following the manufacturer instructions:
Switch the lamp on and off less frequently:
Need to step out of the room briefly? Keep the lamp on! Frequent on/off switching shortens the life of a lamp. Although some power units for mercury lamps have a cooldown waiting feature to prevent frequent switching, being mindful of this characteristic can help you extend the bulb’s life.Make sure your bulb is fresh:
The intensity of mercury bulbs starts to fall off after only 70 hours. By 200 hours, they are significantly weaker. Make sure to change your bulb according to the rated life (200 or 300 hours). Always dispose of these bulbs per your organization’s hazardous waste policy.Align the bulb:
Proper alignment results in homogenous field illumination. Review your user manual to follow the correct process for your lamp house. An easy way to check if your bulb is misaligned is to place a white paper card on the microscope stage (your Olympus rep’s business card would do nicely). Then view it at low magnification using blue excitation. Cellulose naturally fluoresces, so uneven illumination will be readily apparent.Keep a spare handy:
Always keep at least one spare on hand in case of bulb failure. Sometimes old mercury bulbs simply stop firing up, and you don’t want to be caught without a bulb when you are all set to image your samples. Remember to change the bulb per the manufacturer’s instructions (typically after 200 or 300 hours, depending on the bulb) and dispose of the old one as mercury hazardous waste.
Mercury and Metal-Halide Lamp Systems
Mercury and metal-halide lamp systems use a pre-centered long-life metal-halide bulb doped with mercury. These bulbs typically last 2,000 hours and are installed pre-centered in the main power unit. Illumination is usually delivered to the microscope through a liquid light guide (LLG), though there are a few direct mounted units on the market.

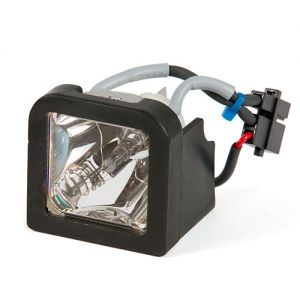
An example of a metal-halide lamp
Such light sources maintain a relatively stable output for the first 1,000 hours, after which intensity starts to decline. Consult the manufacturer’s technical information for spectral output over time and replacement per instructions. As with mercury bulbs, you will want to dispose of the old one per your organization’s hazardous waste policy.
Many people don’t realize that the LLG degrades with use and becomes significantly less efficient after 4,000 to 6,000 hours. If your main power unit has a built-in shutter, use it rather than the one on the microscope to block excitation light. This will help maintain the LLG’s efficiency longer.
Nonetheless, you should plan to change the liquid light guide after the second or third bulb replacement. Liquid light guides don’t need to be centered but must be fully seated in both the power unit socket and the LLG adapter mounted on the microscope. Make sure to follow the manufacturer’s instructions when replacing the LLG.

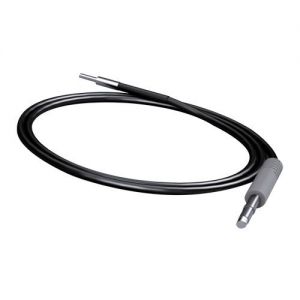
Liquid light guides deliver light to the microscope
LED Light Sources
Upgrading from a mercury-based fluorescence light source to a light-emitting diode (LED) unit has many benefits for microscope performance and ease of maintenance, including:
- More and brighter spectral peaks than mercury
- Instant on/off without warm-up
- Extremely long life (20,000 hours or more)
- No need to purchase or align bulbs (hurray!)
- Environmentally friendly due to lower energy consumption and the absence of mercury
Many LED sources produce peak spectral output brighter than mercury at key wavelengths such as 488, 568, and 647. Models are available with anywhere from three to 16 independent, rapid-switching excitation wavelengths.
LED sources have very fast on/off times and most offer variable intensities, some by wavelength. They can shutter wavelength by hand controller or be triggered via USB or transistor-transistor logic (TTL) signal from your PC/software. Those that offer individually triggered wavelengths are fantastic for upgrading an older, manual microscope to automated multichannel fluorescence (using a multichannel filter set). Go one step further and add a Z-focus device, environmental chamber, and appropriate software to convert that old manual inverted microscope into a live-cell time-lapse imaging system.
LED systems are much easier to manage because they require no alignment and have no bulbs to change. They last tens of thousands of hours, have no mercury waste, and consume much less energy. As a result, they can expand the range of applications you can manage with your older microscope at a much lower overall cost of ownership.
Find More Microscope Improvement Tips from the Experts
We believe getting more out of your existing microscope system should be easy. That’s why we put together a series of posts on the topic to make the process as simple (and stress free!) as possible.
If you haven’t yet, make sure to review the first part of our microscope improvement series: 5 Ways to Extend the Life (and Performance) of Your Microscope. And stay tuned for our next part to learn simple upgrades for stable live cell imaging.
Related Content
5 Ways to Extend the Life (and Performance) of Your Microscope


